


How to Do Injection Molding at Home in 2026?
Injection molding at home is becoming more practical in 2026, but it is not a simple kitchen experiment. Small benchtop machines can produce useful parts from thermoplastics such as polypropylene, ABS, or recycled pellets. The results depend on temperature control, mold design, clamping pressure, and careful preparation. Small errors matter.
A realistic home setup may include a compact injection machine, aluminum molds, a reliable thermometer, calipers, ventilation, and heat-resistant gloves. Keep the workspace clean and well lit. Secure the machine to a stable bench. Never reach into a mold during operation. Hot plastic can cause serious burns, while unexpected pressure can damage equipment. Follow the machine manufacturer’s instructions and local electrical and workplace safety requirements.
This guide focuses on responsible, small-scale production for prototypes, educational projects, and simple household components. It explains material selection, mold preparation, heating, injection, cooling, trimming, and quality checks. You will also see where beginners commonly waste material or misread defects. Warping, short shots, sink marks, and flash are normal learning problems. They are frustrating. They are useful clues.
Some advice requires judgment rather than a fixed recipe. Every machine, mold, and polymer behaves differently. Test with small batches before making many parts. Avoid unverified materials for medical, child-related, structural, or food-contact applications. Certification may be required for those uses. A careful maker records temperatures, cycle times, and defects after each trial. That habit builds repeatable results and reveals weaknesses honestly. Home manufacturing can be rewarding, but only when convenience never replaces technical discipline.
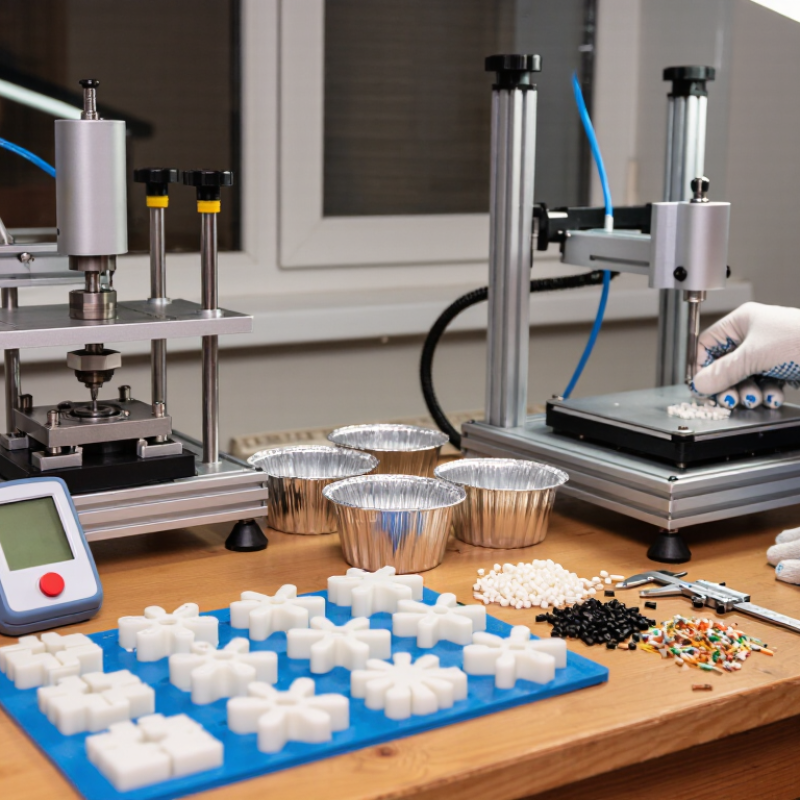
Table of Contents
[Hide]
What Injection Molding at Home Involves in 2026
Injection molding at home in 2026 involves more than melting plastic and pressing it into a mold. A small setup needs a heated barrel, injection plunger, clamping frame, mold, cooling space, and reliable temperature control. Grand View Research estimates the global injection molding machine market reached about USD 15.4 billion in 2023. That figure reflects strong industrial demand, not effortless home production.
Material choice changes the entire process. Common thermoplastics require different melting ranges, drying conditions, and cooling times. PlasticsEurope reported global plastics production of 413.8 million tonnes in 2023, showing the scale of the material system behind small experiments. At home, however, poor drying can create bubbles, weak edges, or rough surfaces. I once underestimated cooling time. The part looked complete, but it warped after removal.
A practical workspace needs ventilation, heat-resistant gloves, eye protection, stable electrical equipment, and clear separation from children or flammable materials. ISO 20430:2020 identifies safety requirements for injection molding machinery, including guarding and operating hazards. Small machines still generate serious heat and pressure. Mold alignment also matters. A tiny gap can produce flash around the parting line. Scrap rates may feel disappointing. That is normal, but recording temperatures, pressure, cycle time, and defects makes each trial more reliable. Home molding remains a controlled manufacturing experiment, not simply a craft activity.
How to Do Injection Molding at Home in 2026? - What Injection Molding at Home Involves in 2026
| Process Element | What It Involves | Typical Home-Scale Range or Requirement | Practical Consideration |
|---|---|---|---|
| Plastic Feedstock | Thermoplastic pellets or clean, known plastic regrind are heated until they can flow and then injected into a mold. | Common materials include polypropylene, polyethylene, ABS, and certain grades of nylon or PLA. The correct temperature depends on the material grade. | Do not mix unidentified plastics. Different polymers can require different temperatures, drying procedures, and mold settings. |
| Barrel Temperature | The heating barrel melts the polymer before injection. | Typical processing windows are approximately 180–240°C for polypropylene, 180–230°C for polyethylene, and 210–260°C for ABS. | Use the manufacturer’s technical data for the specific resin. Excessive heat or residence time can degrade plastic and produce fumes. |
| Mold Temperature | The mold shapes the melt and removes heat so the part can solidify. | Many general-purpose thermoplastics can be molded with a mold temperature of approximately 20–60°C; engineering plastics may require higher temperatures. | A warmer mold can improve surface finish and reduce visible weld lines, but it usually increases cooling time. |
| Clamping Force | The mold halves must remain closed while molten plastic is injected under pressure. | A common preliminary estimate is about 2–5 tons of clamping force per square inch of projected part area, including runners and gates. | The required force varies with material, injection pressure, part geometry, and mold design. Insufficient force can cause flash at the parting line. |
| Shot Size | The machine’s injection unit must hold enough melted material for the part, sprue, runners, and a small process cushion. | Small benchtop equipment commonly handles gram-scale shots, often approximately 5–50 g, depending on the machine design. | The required shot size should normally remain below the machine’s rated maximum to maintain stable filling and consistent melt temperature. |
| Mold Construction | A two-part mold contains the cavity, sprue or gate, vents, alignment features, and an ejection method. | Aluminum is frequently selected for small-batch molds because it is relatively easy to machine and transfers heat efficiently. Steel provides greater wear resistance but is harder to machine. | Include draft angles, rounded corners, adequate venting, and a parting line that allows the molded part to release without damage. |
| Drying Requirements | Some hygroscopic plastics absorb moisture from the air and must be dried before molding. | Nylon, PET, PC, and some thermoplastic polyurethanes commonly require controlled drying. Drying temperatures and times vary by resin grade. | Moisture can cause splay, bubbles, weak parts, hydrolysis, or inconsistent dimensions. Follow the resin supplier’s drying instructions. |
| Injection and Holding | The screw or plunger injects the melt, followed by holding pressure to compensate for shrinkage while the gate remains open. | Use a controlled fill followed by a lower holding-pressure stage. The exact settings depend on part thickness, gate size, resin, and mold temperature. | Too much injection speed can create burn marks or trapped air; too little pressure can cause short shots or sink marks. |
| Cooling Time | The part remains in the closed mold until it is rigid enough to eject without distortion. | Small parts with thin walls may cool in roughly 10–30 seconds, while thicker parts can require substantially longer cooling. | Cooling time is strongly affected by wall thickness, plastic type, mold temperature, and cooling-channel design. |
| Expected Shrinkage | The molded part contracts as the plastic cools and solidifies. | Many unfilled thermoplastics show approximately 0.5–2.5% linear shrinkage; glass-filled grades may shrink less but can be directionally anisotropic. | Compensate in the mold design only after checking the selected resin’s datasheet and validating test parts. |
| Ventilation and Safety | Heating plastics can release vapors, and the machine introduces hot surfaces, pinch points, and stored mechanical or hydraulic energy. | Use local exhaust or strong ventilation, heat-resistant gloves, eye protection, guarding, and a clearly accessible emergency stop. | Never process unknown plastics, PVC, fluoropolymers, or contaminated material without verified processing controls and suitable emission management. |
| Quality Checks | Finished parts are inspected for dimensions, flash, short shots, sink marks, warpage, burn marks, and surface defects. | Useful basic tools include calipers, a scale, a thermometer or temperature controller, and a written process log. | Change one setting at a time and record material lot, barrel temperature, mold temperature, injection time, holding time, and cooling time. |
The ranges shown are typical starting points for small-scale work, not universal machine settings. Always confirm the resin supplier’s technical data, machine instructions, electrical requirements, and local safety regulations before operating injection-molding equipment.
Related Posts
-
2026 Best Injection Molding at Home Machines?
-
How to Successfully Perform Injection Molding at Home?
-
China’s Top Tips for Injection Molding at Home for DIY Enthusiasts?
-
How to Choose Over Molding Manufacturers in 2026?
-

How to Order Injection Molded Parts Effectively in 2026?
-

Top Precision Plastics Innovations Transforming the Industry?